Seed Saving
I’ve never been a seed saver before.
The only seeds I ever really made use of from something I grew was chive seed. As my chives would flower, they would eventually dry up, and when I plucked them off the plant, I would scatter the seeds right back into the soil there.
That’s the closest I got to seed saving.
A few weeks ago, I was eyeing up the last two Black Cherry tomatoes from our adventure in the Twin Cities. I was going to just pop them in my mouth and savor them until next year, when I decided that if I was going to learn to save seed, this was the time.
I headed to about.com and found a great tutorial on saving seeds. I followed it pretty closely. The biggest difference I had was that I didn’t need a spoon, because they were tiny cherry tomatoes. I just split them open with my fingers, scraped the seeds into an 8 oz canning jar and popped the remainder into my mouth. ( Still delicious without the seed juice.) I added about 3 ounces of water to the jar, shook it a bit, and then added a simple lid. My lid was a piece of paper towel, held in place by a canning ring. I also labeled the paper towel- just in case I got crazy with the seed saving.
It worked just like the tutorial said it would, except that I let my jar sit for a good two weeks before I removed the moldy scum from the top of the jar. I don’t know if I needed to let it go that long, but I was expecting a good layer, and it took that long for it to really develop.
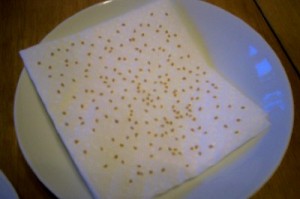
I scooped out the scum, poured the seeds and water into a sieve and ran cold water over them. After that, I spread them on a paper towel to begin drying. The tutorial says not to use paper towel, actually, but several hours later, I used my fingers to move the seeds around and separate those which had stuck together. They are not sticking to the paper towel at all. Here they are, drying.
Now, as I picked at these seeds to spread them around, Andy jokingly asked if the effort was worth saving the $3 on a packet of seeds. I kind of laughed with him, and told him maybe not. But. There are over 100 seeds here on this small square of towel. Now we’re up to at least $12 worth of tomato seeds. And on top of that, these are heirlooms- and a delicious variety at that. Now I have seeds to start for next year, and I have plenty to share with gardening friends. Yes, worth the trouble in my book.
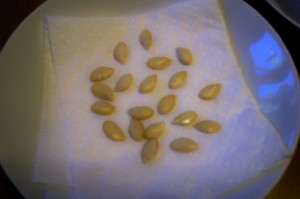
Then yesterday, I split a pie pumpkin in half to roast up. Immediately, I knew I’d be toasting up some pumpkin seeds for eating, but you know I had to do it… 20 Sweet Pie Pumpkin Seeds drying out, to maybe be planted in the future- this pumpkin was very delicious.
Pumpkin seeds don’t need to be treated like tomato seeds- simply dried completely before saving until spring.
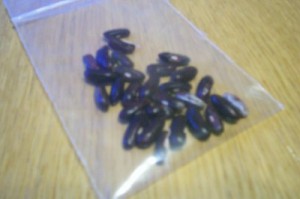
And finally, I have my Fortex Pole Bean seeds that I saved earlier this year. I had some beans that grew into monsters on the plant. I picked them and decided to try and save the seed from them. I literally just let the pods sit around until they dried completely. Then it was a simple matter of peeling them off the very hard and very dry seeds held within. Voila! Bean seeds for next year.
None of these were difficult to do at all. I don’t know why I’ve never saved seeds before. No, wait I do know. I worry about cross-pollination. I know better than to save any of my pepper seeds- those cross-pollinate very easily. But tomatoes are self-pollinating almost all the time. And while I wouldn’t sell these seeds, in case they don’t produce true Black Cherry plants, they are just fine for me.
I’m rather excited about taking this next step in the world of gardening.


