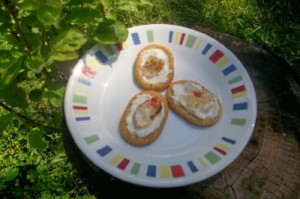
In the not so distant past, whenever I would hear the words “pepper” and “jelly” in a sentence, my tongue would curl. I would shudder internally as I thought about that crazy combination- it just didn’t work in my mind. And then last winter, a friend came over for a visit, and brought with her a jar of pepper jelly. She knows that I love playing with new or exotic foods, and will frequently find something out and about to send my way. This was one that I was not particularly eager to try, but I put on my game face and assembled a plate using this pepper jelly. The only thing I knew to do with it was pour it over a block of cream cheese- only, instead of using a block, I softened and smeared the cream cheese onto a plate and then topped that with a layer of the jelly. I added a basket of pita chips, and bravely tucked in.
It was a revelation. While I was visiting with my friend, my bites were dainty and lady-like, but the second I was alone, I was all over that plate of cream cheese and pepper jelly like it was the last food on earth. It was that good. I didn’t even need the pita chips! A few days later I shared this treat with Andy, and he was also smitten. How is it that we’ve never experienced this delight known as pepper jelly before? I instantly thought of all the pepper jelly recipes I’ve seen over the years and I could not wait for the garden bounty to begin rolling in so that I could make this spectacular stuff myself.
That day finally came. I’ve had this pepper plant growing in the garden that is not what it is supposed to be. I bought a habanero plant, and what has grown is some kind of banana pepper plant. This plant has bright, big and ready-to-eat peppers, but it is not quite time for making salsa, as the tomatoes are just starting to come in. Last week was flipping through my Ball Complete Book of Home Preserving, trying to decide which salsa recipes to try this year, when I came upon the pepper jellies. The angel chorus began singing, and I went shopping for the few ingredients I did not have to make this delicious Basil Banana Pepper Jelly.
The recipe calls for 1/2 cup of thinly sliced mild banana peppers, and 1/4 cup assorted chili peppers. Together, that makes 3/4 cup of peppers, and as long as you don’t go over that 3/4 cup, you can play around with assorted sweet and hot peppers to come up with your perfect assortment. It only took me 2 banana peppers to get that 1/2 cup, and then I used one fourth of a red bell pepper and two green serranos for added color- and a touch of heat from the serranos. A few leaves of fresh basil from the garden, and in no time at all I was boiling away my first batch of this jelly. It smelled so good! And it cooked up much more quickly than I expected. I bottled it up in tiny 4 ounce jars and processed them in a boiling water bath for ten minutes.
This was just so easy! And so, so delicious! I also made a few other varieties of jellies, which I’ll talk about another time, but I’m having plenty of visions of having company and sharing this amazing pepper jelly with crackers and cream cheese. Or maybe I won’t share. No one will ever know if I don’t…
Basil Banana Pepper Jelly
from The Ball Complete Book of Home Preserving
makes about 3 (8-ounce) jars
1/2 cup thinly sliced seeded mild banana peppers
1/4 cup thinly sliced partially seeded red or green chili peppers
1/4 cup finely chopped red onion
3 to 4 large fresh basil leaves, cut into thin ribbons
1/4 teaspoon dried basil
3/4 cup white vinegar
3 cups granulated sugar
1 pouch (3 ounces) liquid pectin (such as Certo brand)
1. Prepare canner, jars and lids.
2. In a large, stainless steel saucepan, combine banana peppers, chili peppers, red onion, fresh and dried basil and vinegar. Stir in sugar. Over high heat, stirring constantly, bring to a full rolling boil that cannot be stirred down. Stir in pectin. Boil hard, stirring constantly, for 1 minute. Remove from heat and quickly skim off any foam.
3. Quickly pour hot jelly into hot jars, leaving 1/4-inch headspace. Wipe rim, center lid on jar. Screw band down until resistance is met, then increase to fingertip tight.
4. Place jars in canner, ensuring they are completely covered with water. Bring to a boil and process for 10 minutes. Remove jars, cool and store.
