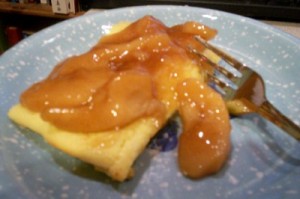
One of the new recipes I tried this canning season was a recipe for Canned Apple Pie Filling. I absolutely love the idea of pie filling, but I have never purchased a pie filling that was really and truly delicious. They are okay, and fit the bill sometimes, but they really are never the same as baking a fresh pie with fresh fruit. What I especially love is the convenience of canned pie filling. Having it on hand, all you need is a disk of pie dough and you can make yourself a pie. We love pie, and anytime I can try and save a step or two is welcome, because then we’ll have pie more often! I have not been happy with the pie filling I have frozen in the past, and freezing whole pies really doesn’t work the best either. Homemade pie filling in a jar though? One where I know exactly what is in it? I’m all over that one.
What has always stood between me and canned pie filling is a little ingredient called Clear Jel. It’s a food starch that is officially approved for use in home canning. With other starches (like cornstarch, arrowroot, flour) you run the risk of the starch causing the mixture to be too thick and it doesn’t heat properly in the canner. Clear Jel fixes this, and makes canning pie filling entirely possible. It’s something that’s not simply available on any store shelf though, so you need to order it online or find a bulk food store that carries it. I did just that. I was at my local bulk food store when I saw the Clear Jel on the shelf. It had to come home with me right away, and I was SO excited because I knew this meant that I was going to make pie filling from the apples we’d picked at the orchard. I did make the filling, and last night was the first time we sampled a jar with an oven baked pancake. The filling was delicious- not too sweet, not too thick, just plain tasty, and I’m looking forward to making pie with it.
The reason I wanted to share this now is because this would make a spectacular homemade Christmas gift. I can’t tell you how excited I would be to find a few jars of homemade pie filling in a gift basket! The one thing I will say is that one batch of this recipe made 7 pint jars for me, and you will need two jars to make a decent pie. You cannot can this in quarts, so just use the pints and remember to gift two jars at a time, along with a little note for your recipient to use both jars to make one pie. Of course, the filling can also be used as a pancake or waffle topping as we did, or a tart filling, a cheesecake topping, an ice cream topping, etc. The possibilities really go on. As to the apple varieties, Granny Smith would actually work really, really well for this, as it holds it’s shape and texture when cooked. You can probably use any apple you can find at the grocery store, and can definitely use a blend of apples. I plan to do that next year.
If you need a source for ClearJel, I shop locally at Granary Bulk Foods here in Appleton, but you can certainly order online from them. They have some great products, and they are always fresh when I shop there.
Apple Pie Filling
from Ball Complete Book of Home Preserving
12 cups sliced peeled cored apples, treated to prevent browning and drained 2 3/4 cups granulated sugar 3/4 cup ClearJel 1 1/2 teaspoon ground cinnamon 1/2 teaspoon ground nutmeg 1 1/4 cups cold water 2 1/2 cups unsweetened apple juice 1/2 cup lemon juice (bottled)Directions:
Prepare canner, jar and lids
In a large pot of boiling water, working with 6 cups at a time, blanch apple slices for 1 minute. Remove with a slotted spoon and keep warm in a covered bowl.
In a large stainless steel saucepan, combine sugar, ClearJel, cinnamon, nutmeg, water and apple juice. Bring to a boil over medium-high heat, stirring constantly, and cook until mixture thickens and begins to bubble. Add lemon juice, return to a boil, and boil for one minute, stirring constantly. Remove from heat. Drain apple slices and immediately fold into hot mixture. Before processing, heat, stirring until apples are heated through.
Ladle hot pie filling into jars, leaving 1-inch head space. Remove air bubbles and adjust headspace, if necessary, by adding hot filling. Wipe rim. Center lid on jar. Screw band down until resistance is met, then screw to fingertip tight.
Place jars in canner, ensuring they are completely covered with water. Bring to a boil and process for 25 minutes. Remove canner lid. Wait 5 minutes, then remove jars, cool and store.
