Wow! My kitchen has been fairly non-stop for a good month or so. Every spare moment I had was spent preserving this or that. Jams, jellies, salsas, tomatoes, peaches, pickles, pears, cherries, the list goes on and on! I feel so blessed to have these mountains of homemade preserves on hand.
I still don’t have a place to put them. But in the meantime, they pile up in my dining room and the school room and make me smile.
Preservation season is beginning to wind down, but there is still plenty to do. I have bushels of apples in the basement waiting to be turned into applesauce and preserves, and we’ll be making at least one more trip to the orchard as well. I’m hoping I’ll find a great source for locally grown pie pumpkins- and I’m keeping a very close eye (online, from a distance) on a cranberry producer a few hours southwest of us. I hear a rumor they ship by the case when the cranberries are fresh- which should be next week. I will keep you posted if that rumor holds true.
Anyway, what I wanted to share was a few waste-not, want-not ideas for food preservation. One of the worst things (to me) about all this canning and preserving is the mountain of debris that gets discarded. The fruit peelings, tomato cores, and all those cherry and peach pits! Normally, I would compost that, but my compost bin is not ready yet (and is not on the priority list for the moment). I recalled that a few years ago I made an Apple Peel Jelly which Andy still raves about to this day, and I wondered if I could do something similar with peach peelings.
My friend Google let me know that this was definitely a possibility, but most of the recipes I found included the pits in the preserves. I just wasn’t comfortable using the pits. Peach pits contain the chemical amygdalin, which, when broken down by the human body, becomes cyanide. The risk may be small using the pits in such an application, and people may have been doing so for years, but I was not going to go there.
Pits were discarded, but as I prepared peaches for canning, I accumulated quite the mound of peelings. My recipe called for 1.5 quarts of peelings- or six cups. I had just enough! So I added the peelings to a pot with 5 quarts of water and brought that to a boil, then reduced it to a simmer. I let it simmer for 45 minutes, giving it a stir here and there.
Once it was done simmering, I placed a sieve over a bowl and carefully poured the peelings into the sieve. The juice ran through to the bottom while the peelings were caught in the sieve. I needed 4 cups of juice total, and was just a bit shy, so I gently pressed on the peelings until I had 4 cups of juice. Pressing on the peelings is not ideal for perfect jelly appearance, as it makes the jelly cloudy, but I thought that preferable over thinning the juice with extra water.
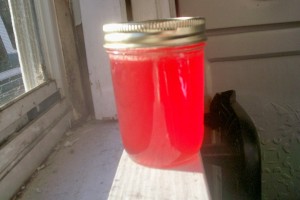
So, juice now in hand, I could proceed with the simple jelly, following the instructions for cooked jam/jelly in the box of Sure-Jel. 4 cups of juice, 5 cups of sugar, and 1 box of pectin. A short while later, I was ladeling some of the most beautiful jelly into jars. Andy absolutely loves it- and is eager to compare it with a fresh batch of apple peel jelly as well. And just look at this color- who needs artificial colorings?
Peach Peel Jelly
1 1/2 quarts peach peelings 5 cups water 5 cups white granulated sugar 1 box pectin (not low-sugar or no sugar)Directions:
Prepare
Combine the peach peelings and the water in a pot. Bring to a boil, and then reduce heat to a gentle simmer. Cover. Simmer for 45 minutes, stirring occasionally.
Place a fine strainer or sieve over a large bowl. Carefully and gently, pour the peelings and thier liquid into the strainer. You need 4 cups of juice- if you don’t have quite enough, press very gently on the peelings to extract more of their juice. You can always add a bit of water at the end to get the full 4 cups.
Pour the 4 cups of juice into a medium sized pot. Add the package of pectin and stir well. Turn up the heat and bring it to a boil, stirring frequently. Once the mixture is at a full rolling boil- meaning that it won’t stop boiling while being stirred- add all the sugar at once. Stir well.
Continue to cook and stir until the mixture comes again to a full boil. Once the full boil is achieved, cook it for one full minute.
Remove from heat and ladle the jelly into prepared jars. Add lids and rings and process in a boiling water bath for 5 minutes.
