I’ve talked about this bread before. I don’t remember when, but I clearly recall talking about it, taking a photo of a gorgeous loaf of bread, but then telling my readers that the recipes was like 5 pages long and I wasn’t about to type it all in for a blog post.
The fact is, the recipe is 5 pages long, but honestly? Most of it is pointless. The recipe comes from The Bread Bible by Rose Levy Beranbaum. The book itself is wonderful, I honestly haven’t made very many of the loaves in the book, only because they all are several pages long and time consuming. This Rustic Hearth Bread was the first one I made out of this book, and over the years since I first made it, has gotten easier and easier. I know what I’m doing now, and I use those five pages to refresh my memory on quantity for ingredients, and bake time. Everything else is extra.
While this book also goes so far as to detail specific ingredients to be used, I discard that also. Of course the author is going to recommend top notch organic flours to be used, but in my real world kitchen, those are way beyond my price range. Oddly enough, the supermarket brands listed are not brands that I have good results from either, so I stick to what I can get and feel comfortable getting. For me, that means that my flours are Dakota Mills brand flours. I buy both all-purpose and bread flour, and have them on hand at all times. Dakota Mills does not bleach their flour, and I find it really reliable and consistently good. I think anyone who’s sampled my bread can agree.
So let’s make some bread, shall we? The one thing you need to make this loaf of bread is time. But it does not need to be a solid chunk of time until it’s time to bake. This bread is flexible,and whether you use the shortest times or longest times, it turns out delicious every single time.
Oh- one quick note about yeast. I’ve become a convert of instant yeast. This is not the same as active dry yeast- so check the packaging. This is one thing I love to by at Sam’s Club because you can buy it in a 1 pound package for just a few dollars. Then I put some in a jar in the fridge, and put the rest in a ziploc bag in the freezer. It keeps for at least a year, but I use it up much faster. My grocery store has also started carrying the big package of instant yeast- SAF brand if I recall correctly. Fleischmann’s Rapid Rise yeast is instant as is Red Star’s QuickRise or Instant Active Dry.
So the first thing you need to do is grab a small mixing bowl and a whisk. You could use a hand mixer on low for this first step as well. Into this bowl add:
- 1 cup bread flour
- 1/4 cup whole wheat flour (white, regular, graham, doesn’t much matter)
- 3/8 teaspoon instant yeast
- 1 1/4 teaspoons honey
- 1 1/3 cups room temperature water
Whisk all these things together for about two minutes, or until there aren’t any lumps remaining and the mixture is nice and smooth. It should remind you of pancake batter. Use a rubber spatula to scrape down the sides of the bowl so all the mixture is together.
Next, get another small bowl and add:
- 1 3/4 cups bread flour
- 1/2 teaspoon instant yeast
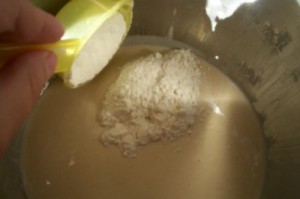
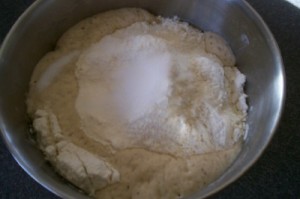
Mix the flour and yeast together, and then very gently, scoop this mixture on top of the batter-like mixture. You want to cover the batter mixture completely with the flour/yeast mixture. Don’t stir it in, just scoop it on top.  There’s a picture of the flour floating on top of the batter. Cover the whole thing, right up to the edges of the bowl. Cover the bowl tightly with plastic wrap and then you have a decision to make. You can let this rise on the counter for 1 to 4 hours. A longer time will give the bread a fuller flavor, but the 1 hour minimum time is just fine too. Alternatively, you can let it sit on the counter for 1 hour and then put it in the fridge to sit overnight. Then you pull it out of the fridge and let it come to room temperature for an hour before continuing with the recipe. I usually have time to let it do it’s thing for the four hours, but letting it go overnight in the fridge is a great way to let it work while you are sleeping.
So you’ve let your bowl rest for a minimum of one hour. Your batter mixture should be bubbling away and should have started bubbling through the flour on top. It looks like this after four hours:

Now you’re going to get 1 1/2 teaspoons of salt and sprinkle that in. Grab your sturdiest wooden spoon (or for the brave, just use your hand) and start stirring. You want to stir and fold and mix until all the flour has been incorporated into the liquid. Once the dough has come together a bit, you want to dump it out onto a countertop that has been sprinkled with flour.
Now use your hands and knead the dough. For an excellent tutorial on hand-kneading, check out this Epicurious video. It may seem intimidating at first, but once you get into a rhythm, kneading goes quickly, and you get more comfortable with it. You’re going to knead this dough for 5 minutes. Add flour as necessary to keep it from sticking to your counter or your hands. Then, you’re going to take your empty mixing bowl and place that over your dough ball, which is sitting on the counter. Set your timer for 20 minutes and walk away.
When you return, your dough will be much less sticky and easier to work with. Now you’re going to knead it some more, adding additional flour as necessary, knead for another 5 minutes or so. It should be very smooth and elastic, and barely sticky to the touch.
Spray a clean mixing bowl with cooking spray and drop your doughball in. Spray the top lightly and cover the bowl with plastic wrap or a slightly damp tea towel. Let it rise for 1 hour at room temperature.
Dump the dough out onto the counter, knead it 4 more times, then shape it back into a ball and drop it back into your mixing bowl. Cover again with plastic wrap. Let it rise for 45 more minutes.
*At this point, you can also put your doughball into the fridge for another overnight rise. I’ve made this bread take as long as three days to make and it was so delicious when I did that. If you decide to go with the overnight rise, you need to let the doughball come back to room temp before shaping for the final rise. (That takes about 1 hour to do)
Shape your dough into a ball that’s about 6-inches across. Alternatively, you can shape it into a log and drop it into a sprayed loaf pan as well. I like to make a rustic round loaf with this dough. Set your round onto a baking sheet that has been sprayed with cooking spray, and if you want, sprinkled with a little cornmeal. Cover and let this rise for another 45 minutes.
Meanwhile, turn the oven on to 475º. If you have a baking stone and want to use it, put that in the oven while it’s heating. A stone is not necessary.
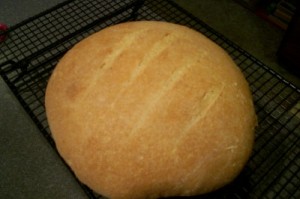
We’re almost ready to bake. First, though, I want you to take a sharp knife and slash the top of the loaf two or three times. Make a design or shape if you want- what you really want is to give a vent for air bubbles to escape from. Finally, if you have a spritzer bottle handy, give the loaf of bread a spray of room temperature water. This is not necessary- but adds to the look of the finished loaf.
Pop the loaf into the oven (sliding the baking sheet onto the baking stone if using a stone,) and bake for 10 minutes. Reduce the temperature to 425ºF and bake for another 25-30 minutes, or until golden brown. Allow to cool completely before slicing. (Yeah, right, give it as long as you possibly can though.)

This whole process may seem complicated, but really, once you have done it a few times, and get more comfortable with it, it goes quickly. There is nothing like freshly baked homemade bread- and this particular loaf will rival anything you can buy at an artisan bakery. I have requests often for this specific loaf of bread- it’s that good. It’s amazing fresh and warm with butter, and phenomenal the next day toasted up with some apple or pear butter. Of course, that’s assuming a bit much, assuming that it will survive to live another day.
Hmmm, sounds similar to my feelings about making bagels. Maybe I’ll give this one a try next. I checked that book out of the library once, but couldn’t get past the long, long recipes.
Lucky, I like to make my own bagels too- but I don’t do it near often enough. I should. I really should, because they taste sooooo good!